How to Upgrade Single Server Exchange 2007 to Exchange 2010
A – PREWORK:
- Install R2 of Windows 2008 64 Bit on a new box and run Microsoft Update to patch it to whatever is current.
- If the server is not already a Domain Controller, you need to run DCPROMO to make it so, assuming you are going to fully decommision your old single server, if not skip to item 3. Make sure you move the FSMO’s to your new DC.
- Install the Microsoft Office System Converter Filter Pack which you can source HERE. This lets your Exchange Server index Office documents. It is not absolutely needed but both the Exchange pre-install check and the System Health Checks will throw a skippable errors if you don’t have it.
- Start the TCP Port Sharing service and set it to automatic. You can do this through the services GUI or use command line:
Sc config NetTCPPortSharingstart=auto - Install all the required prequisite software which basically is .NET, RSAT Tools, parts of IIS, and the Windows Desktop Experience. It is really quite a lot of work to get this right so MS made it easy by creating install scripts. Don’t worry if you already have some of these features installed, the script is additive only. For complete details on prequisites read THIS.
- R1 of Windows 2008, open an elevated command prompt and navigate to the scripts folder on the root of the Exchange 2010 DVD and run each of the following:
- sc config NetTcpPortSharing start= auto
ServerManagerCmd -i Desktop-Experience – this is only needed for the UM role
ServerManagerCmd -ip Exchange-Typical.xml -Restart
- sc config NetTcpPortSharing start= auto
- R2 of Windows 2008, open a PowerShell command line and these two scripts:
- Import-Module servermanagerAdd-WindowsFeature NET-Framework,RSAT-ADDS,Web-Server,Web-Basic-Auth,Web-Windows-Auth,Web-Metabase,Web-Net-Ext,Web-Lgcy-Mgmt-Console,WAS-Process-Model,RSAT-Web-Server,Web-ISAPI-Ext,Web-Digest-Auth,Web-Dyn-Compression,NET-HTTP-Activation,RPC-Over-HTTP-Proxy,Desktop-Experience –Restart
- R1 of Windows 2008, open an elevated command prompt and navigate to the scripts folder on the root of the Exchange 2010 DVD and run each of the following:
- You may read that the Active Directory Schema has to be updated prior to install but in fact the Exchange setup will quickly and automatically perform that upgrade.
Run a Windows Update and install everything you can.
B – EXCHANGE 2010 CORE INSTALL:
- Start the “Exchange 2010” install and notice that the first two steps are already completed because of the pre-work listed above.
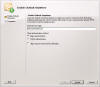
- Choose your language option; most “Westerners” will choose ONLY LANGUAGES FROM THE DVD.
- Let the fun begin! Select “Step 4: Install Microsoft Exchange” and then Typical
- You would think that an upgrade would automatically populate the “Configure Client Access Server External Domain” screen… but it doesn’t, so type in your domain:
- Watch it complete the Readiness Checks and don’t freak out if it finds a problem… the explainations are quite clear and easy to follow.
- Watch the server install (or go watch a sitcom and relax). In my case it took about 20 minutes:
- Your Done! Ya… not quite. Perform some checks to make yourself feel like the upgrade, upgraded. I signed into OWA to make sure my mail system was still fully functional (which was still running on the old 2007 as it should be at this point) and then I looked at my mail boxes using the new Exchange 2010 and finally I ran a health check:
- Next I ran Windows Update but it found nothing, so I assume the updates are pulled during the install process.


Enter your PRODUCT KEY.

C – CONFIGURE EXCHANGE 2010 & MIGRATE YOUR DATA:
Now that the install is complete and tested, you need to perform some migration & configuration tasks:
- Move your mailboxes from the old server to the new server which is a three step process:
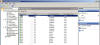
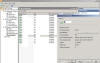
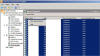
- Go to RECIPIENT CONFIGURATION, MAILBOX, select all (or just a few if you want to test first) of your mailboxes, right click and select NEW LOCAL MOVE REQUEST and follow the wizard. The only wierd part was the last screen has you click NEW (which means START):
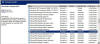
- Go to RECIPIENT CONFIGURATION, MOVE REQUEST and watch it work. If you are getting worried or just want more information you can double click on any of the entries and Exchange will display a progress report:
- After all of the items have a COMPLETED status, right click on them and select CLEAR MOVE REQUEST. Also, note that if you DON’T clear the move request that all of your RECIPIENT CONFIGURATION, MAILBOXes will have little green (move) arrows on them and you will not be able to do much with them.
- Go to RECIPIENT CONFIGURATION, MAILBOX, select all (or just a few if you want to test first) of your mailboxes, right click and select NEW LOCAL MOVE REQUEST and follow the wizard. The only wierd part was the last screen has you click NEW (which means START):
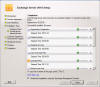
- Change to your ORGANIZATION CONFIGURATION, HUB TRANSPORT, SEND CONNECTORS, right click on the asterisk, select PROPERTIES, and go to the SOURCE SERVER tab. Delete your old server and add your new server:
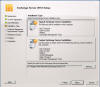
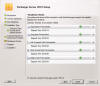
- Enable anonymous users (i.e. anyone on the internet) to SEND to this server by going to SERVER CONFIGURATION, HUB TRANSPORT, right click on your default RECEIVE CONNECTOR, select PROPERTIES, then go to the PERMISSIONS GROUPS tab and selecting Anonymous Users and all the Exchange types:
- Under ORGANIZATION CONFIGURATION, MAILBOX, OFFLINE ADDRESS BOOK tab, delete the old OFFLINE ADDRESS BOOK entry and create a new one for the new server. (There is likely a way to edit to the existing one but after 30 minutes, I just gave up and recreated it… it took about 1 minute.)
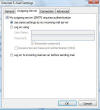
- Enable OWA on the new 2010 server by going to SERVER CONFIGURATION, CLIENT ACCESS, and right clicking on your server and selecting ENABLE OUTLOOK ANYWHERE. Most people will want to leave the authentication method as BASIC (yes, it is still secure because it occurs in an SSL tunnel).
- Sign into the new 2010 OWA on the server using https://127.0.0.1/owa (don’t forget the “S” in https – also just ignore the cerficate warnings, we deal with them in section D below) and send a few emails to make sure everything is working.
- Update your external firewall to redirect traffic to your new exchange servers internal IP address (that would be port 25 and 443 at a minimum. In my case I was scrapping my old server and I ran an authoritative DNS for a few sites so I also had to update the forwarding port 53 and I allow a few clients to use POP so I updated ports 110 and 995 (secure POP).
- Check OWA using your external domain https://mail.yourdomain.com/owa (don’t forget the “S” in https – also just ignore the cerficate warnings, we deal with them in section D below)) and try sending an email to external source then replying.


D – MOVING AN EXCHANGE 2007 CERTIFICATE TO EXCHANGE 2010
I don’t enjoy dealing with certificates, so I buy multiyear certs and so my old 2007 Exchange server had a cert with more than a year left on it and I do not want to buy a new one! Below is how I moved it:
-
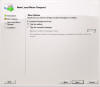
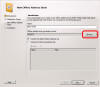
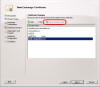
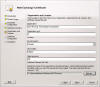
On your new Exchange 2010 server, go to SERVER CONFIGURATION and select NEW EXCHANGE CERTIFICATE, and go through each section. All this wizard does is make you think about what you need secured and build a CSR request; it does not enable these features in anyway. You should have 5 names in your certificate:
NAME EXAMPLE external mail server name mail.commodore.ca autodiscover name autodiscover.commodore.ca root domain name commodore.ca internal fqdn of host server1.corpdomain.local host name server1 If you don’t see those five when you are done the wizard, go back and change ANY of the fields to match. I added “commodore.ca” under the CLIENT ACCESS SECTION and all was well when I got to the next screen.
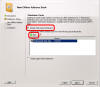
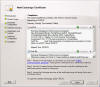
- Select your external mail server name as the COMMON NAME, usually something like MAIL.SERVER.COM. This has to match your old servers common name or most certificate providers will not update your cert.
- Complete the ORGANIZATION AND LOCATION fields with any information and choose a location to put the CSR request file . Exchange does not care about this information but your certificate provider might.
 From this section on I am going to talk about GoDaddy, because that is who I use and that is who I like. However, all other certificate providers will have a similar process.
 - Sign into your GoDaddy account, drill down to your cert, choose REKEY and then paste the contents of the .REQ file you created in the steps above into the dialog box.
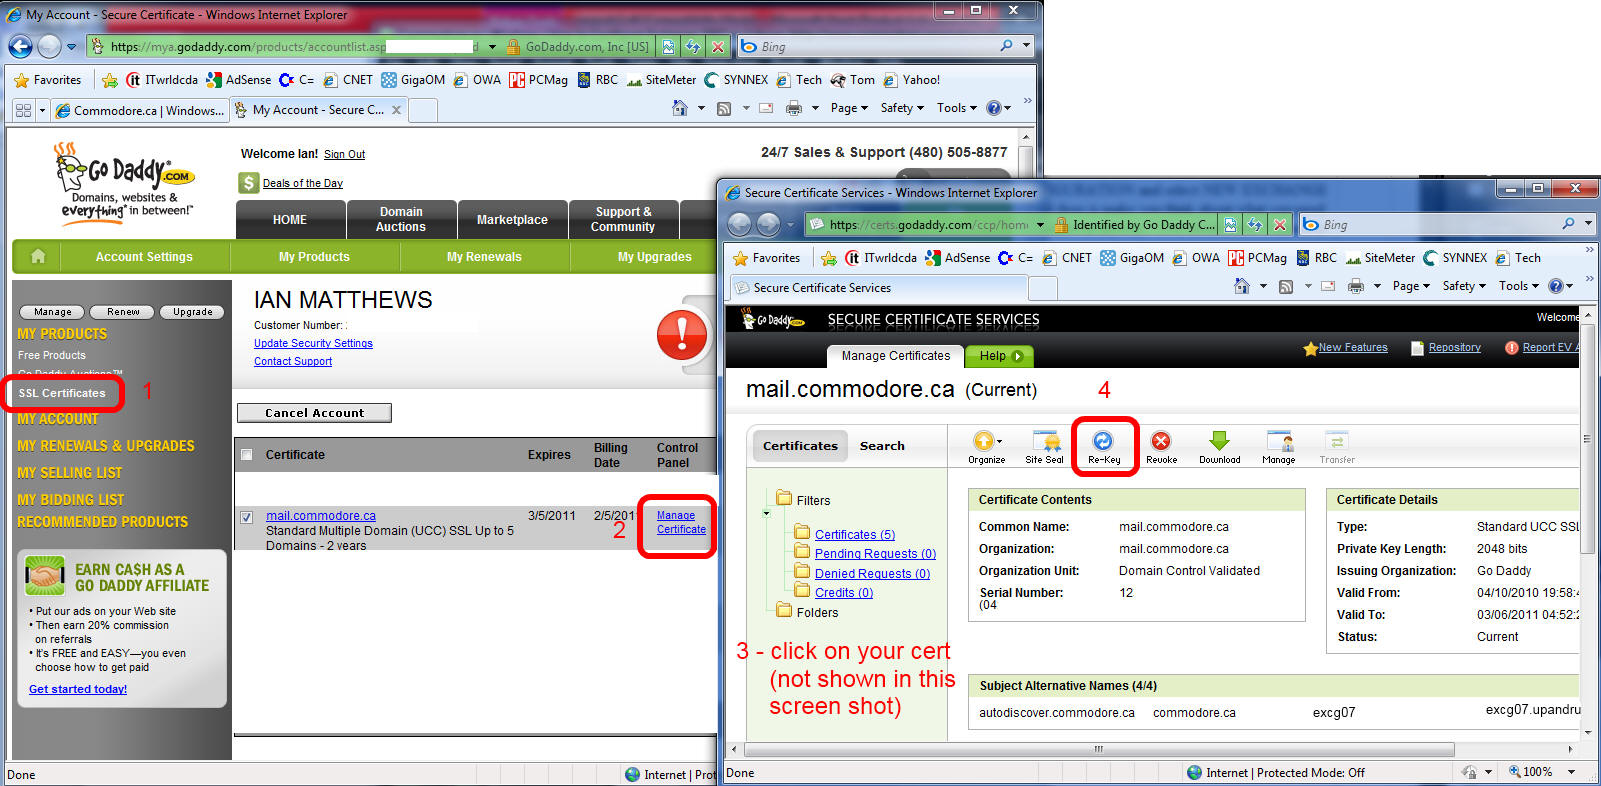
- While still in GoDaddy, go to your certs, choose MANAGE, paste in the contents of the .REQ file (again) and then click little blue RETRIEVE SANS, and then delete the old server entries. Sorry I did not get a screen shot of this. If you have any question call the awesome GoDaddy staff 24 hours a day at 480-505-8877 (and no… I do not have any hooks or profit to/from GoDaddy… but I still love them).
- Wait two minutes for GoDaddy to send you an email verification and then click the varification link:
- In a few minutes, go back to the GoDaddy site, sign in, go to your certificates and select DOWNLOAD.
- Follow GoDaddy’s installation instructions for Exchange 2010 closely:
To Install Intermediate Certificate Bundles
- Type mmc in the Start search box after pressing the Start menu to start the Microsoft Management
Console (MMC). - In the Management Console, select File then Add/Remove Snap In.
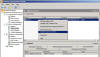
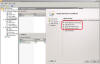
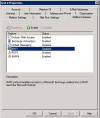
- In the Add or Remove Snap-ins dialog, click the Add button and then select Certificates.
- Choose Computer Account then click Next.
- Choose Local Computer, then click Finish.
- Close the Add or Remove Snap-ins dialog and click OK to return to the main MMC window.
- If necessary, click the + icon to expand the Certificates folder so that the Intermediate Certification Authoritiesfolder is visible.
- Right-click on Intermediate Certification Authorities and choose All Tasks, then click Import.
- Follow the wizard prompts to complete the installation procedure.
- Click Browse to locate the certificate file. Change the file extension filter in the bottom right corner to be able to select the file. Click Open after selecting the appropriate file.
- Click Next in the Certificate Import Wizard.
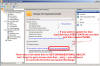
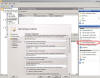
- Choose Place all certificates in the following store; then use the Browse function to locate Intermediate Certification Authorities. Click Next. Click Finish.NOTE: If the Go Daddy Class 2 Certification Authority root certificate is currently installed on your machine you
will need to disable it from the Trusted Root Certification Authorities folder. - Expand the Trusted Root Certification Authorities folder
- Double-click the Certificates folder to show a list of all certificates.
- Find the Go Daddy Class 2 Certification Authority certificate.
- Right-click on the certificate and select Properties.
- Select the radio button next to Disable all purposes for this certificate.
- Click OK.
- Repeat steps 13 to 18, using Starfield Class 2 Certificate Authority as the certificate name to disable.
NOTE: Do not disable the Go Daddy Secure Certification Authority certificate located in the Intermediate Certification
Authorities folder. Doing so will break the server, causing it to stop sending the correct certificate chain to the browser.To Install the SSL Certificate on Microsoft Exchange 2010 – SEE MY SCREEN SHOT BELOW
- Download and open the ZIP file containing your certificate. Your certificate is named
your_domain_name.crt, where your_domain is the common name of your certificate. - Copy the CRT file to your Exchange server.
- Click the Start menu, and then, in the Start search box, type mmc to start the Microsoft
Management Console (MMC). - Click Manage Databases, and then select Server configuration.
- Select your certificate from the Exchange Certificates section (listed by its Friendly Name),
and then, from the Actions menu, click Complete Pending Request. - Browse to your certificate file, click Open, click Complete, and then click Finish.NOTE: Exchange 2010 might display, “The source data is corrupted or not properly Base64 encoded.” You can
ignore this error if, under Self Signed, your certificate is listed as False. If it displays True, refresh your console
by pressing F5. If it still displays True, create a new CSR and then re-key your certificate. - From the Actions menu, click Assign Services to Certificate.
- Select your server from the list provided and then click Next.
- Select the services you want to assign to your certificate, click Next, click Assign, and then
click Finish.
- Type mmc in the Start search box after pressing the Start menu to start the Microsoft Management
- I read nowhere that you need to perform an IISRESET or a restart the EXCHANGE TRANSPORT SERVICE, but I did those anyway and then I rebooted for other reasons… this was not likely required.
- Check your system by logging into your OWA and check your Outlook clients. On my quick test I found:
- one of the machines I checked OWA on still showed a certificate warning but when I check the cert, all was well… a reboot of the client PC took care of this
- one Outlook 2010 client did not update the server information and I had to spend a few minutes adjusting it but then all was well.


E – POP3:
On the off chance you care about POP3, follow these three simple steps:
(Note, this is straight from my 2007 instructions so the screens look slightly different)
- Start the MICROSOFT EXCHANGE POP3 Service on the Server and set it to AUTOMATIC
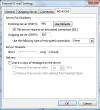
- If you want to block POP3 users from using “Exchange mail” disable MAPI. This is step is only required if you want to use the Outlook 2007 AUTOCONFIGURE feature (or you just don’t want POP users burning up storage on your server)
- If you followed step 2 then when you create a new mail account in Outlook, the autoconfigure will take care of the rest. If you did not follow step 2, then you will setup the POP account like any other and then go into your Advanced Account Settings and turn on MY OUTGOING SERVER REQUIRES AUTHENTICATION and THIS SERVER REQUIRES ENCRYPTED SSL CONNECTION


F – ANTISPAM
If you want to see how to install Forefront Protection 2010 for Exchange read my short instructions HERE, otherwise… read this:
You might be thinking to yourself, hey, I saw the ANTISPAM tab under ORGANIZATION, HUB TRANSPORT, and I even went so far as to check that the configuration from the old 2007 server had moved over… ya… but it will not fuction on the new server until you install it.
- Launch an Exchange Shell, change to the scripts folder (i.e. type cd $exscripts ) and then type .install-AntispamAgents.ps1
- As it tells you, go to the servers SERVICES and restart the Microsoft Exchange Transport Service
- Check the ANTISPAM tab under ORGANIZATION, HUB TRANSPORT and make sure the items are configured. The most important/effective is the IP BLOCK LIST PROVIDERS.

For more information see our AntiSpam section of our Exchange 2007 documentation (section D HERE).
G – QUICK CUSTOMIZE/BRAND OWA (Outlook Web App)
If you want to customize your OWA screens, all you have to do is change two graphics. Both are stored under the following path by default:
c:Program FilesMicrosoftExchange ServerV14ClientAccessOwa#current_numthemesBase
Just snap your corporate logo on to both lgntopl.gif and logoowa.png and save them in the BASE folder. This will be the default for all users as they log in.
Note that lgntopl.gif is also used by the log off screen so you kill two birds with one edit :).
The only problem with this process is that every notable Exchange patch will overwrite your changes so I created a folder called COPY TO BASE where I store these two graphics and I simply re-copy them into the BASE folder after every Exchange upgrade.

There is alot more customization you can perfom but I can not find much on 2010. However, nearly all of the 2007 customization instructions still apply. Sooo you can read THIS for more detail.
H – DECOMMISSION OLD EXCHANGE 2007 SINGLE SERVER
Once you are sure all has been moved to 2010, it is time to dump your 2007. So here is the process:
- Uninstall Exchange 2007 from your old server via PROGRAMS AND FEATURES. The deal here is do NOT use SETUP from the Exchange folder, apparently that will be Hell.
- Next DCPROMO the old Windows Server out of your network and reboot as requested
- Lastly have that old Windows Server join a workgroup (i.e. remove it from the domain).
If you are worried about the process, watch THIS video or THIS Microsoft text (and yes, you can ignore the part where he says you should delete the old Exchange 2007 database before uninstalling… I have both done this and confirmed it with MS Tech Support.)
If for some reason your Exchange 2010 server still has references to the old server, you can removing the old server from the domain manually by following THESE instructions.
I – VERIFICATION:
After you have everything running to your satisfaction you should run a couple of simple and fast system checks:
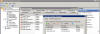
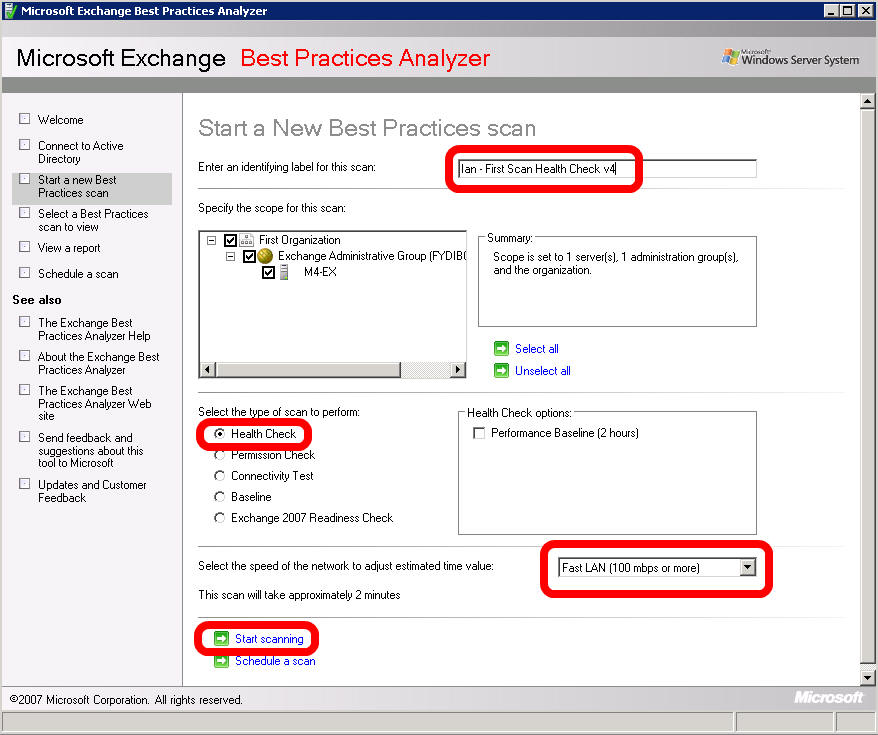
- Run the EXCHANGE 2010 ORGANIZATIONAL HEALTH checker:
- In the Exchange Management Console, click TOOLBOX, BEST PRACTICES ANALYZER, approve any updates and checks that it wants to do and then click GO TO WELCOME SCREEN. Then start a HEALTH CHECK as per the obvious screen shots below. Be sure to read the results and make whatever changes it suggests.
- In the Exchange Management Shell, you should run:get-OrganizationConfig
and then you should run:
Test-SystemHealth
and make sure everything looks as you expect it should.


Categorised as: Exchange, Microsoft, Windows Upgrade
Leave a Reply
You must be logged in to post a comment.