Exchange Server 2010 Database Availability Groups
Other Advantages of Exchange Server 2010 Database Availability Groups
Before we proceed with an example of how to install an Exchange Server 2010 DAG I will also mention some of the other advantages of Database Availability Groups.
- Unlike previous versions of Exchange Server (particularly Exchange Server 2007) Exchange Server 2010 has just one high availability feature for Mailbox servers for all high availability deployment scenarios
- When you create a Database Availability Group the underlying Windows Failover Cluster is automatically created and configured for you
- A Database Availability Group can be created at any time without requiring Exchange Server 2010 to be removed and reinstalled from the server, unlike previous versions that required that clusters be established first before Exchange was installed
- Exchange Server 2010 DAG members can host other server roles, unlike Exchange Server 2007 that prevented clustered Mailbox servers from hosting other roles
Exchange Server 2010 Installation Step by Step
In this tutorial I will demonstrate the installation of an Exchange Server 2010 Database Availability Group on Windows Server 2008 R2.
For this tutorial the following Exchange servers have already been installed.
- EX1 – Exchange Server 2010 SP1 Mailbox server
- Primary interface: 192.168.0.32/24
- Secondary interface: 10.0.5.1/30
- EX2 – Exchange Server 2010 SP1 Mailbox server
- Primary interface: 192.168.0.33/24
- Secondary interface: 10.0.5.2/30
- EX3 – Exchange Server 2010 SP1 Client Access and Hub Transport server
- Primary interface: 192.168.0.34/24
Note: for details of how to deploy these server roles see Installing Exchange Server 2010 Pre-requisites on Windows Server 2008 R2 and Installing Exchange Server 2010.
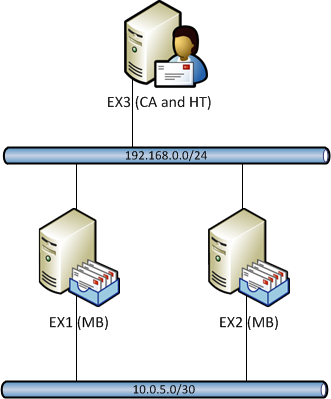
Exchange Server 2010 DAG Tutorial Setup
Each of the Mailbox servers has been configured with its own mailbox database.
- EX1 – Mailbox Database 01
- EX2 – Mailbox Database 02
Note: in Exchange Server 2010 each mailbox database must have a unique name within the organization.
Because the Mailbox servers are configured with dual interfaces it is important to make sure that the secondary interface is not configured to register itself in DNS. Open the TCP/IPv4 properties for the secondary interface one each server, click the Advanced button, navigate to the DNS tab and untick Register this connection’s address in DNS.
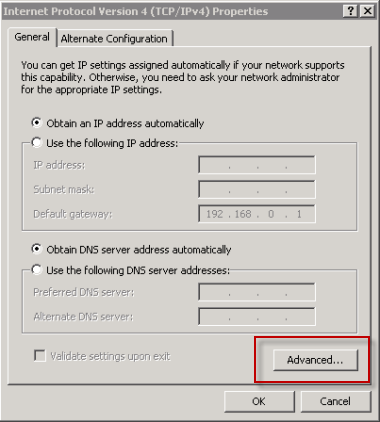
Open the Advanced TCP/IPv4 Properties
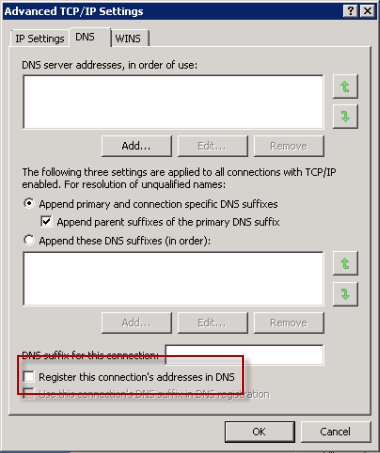
Disable DNS registration for the secondary interface
Creating the Database Availability Group
Log in to one of the Mailbox servers and launch the Exchange Management Console. Navigate to Organization Config/Mailbox and choose New Database Availability Group from the action pane.
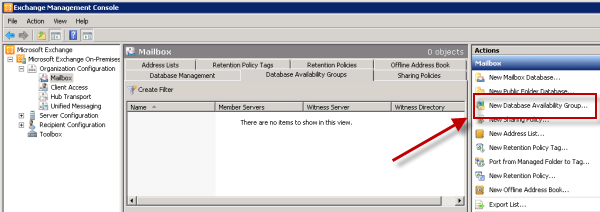
Create a new Exchange Server 2010 Database Availability Group
When the New Database Availability Group wizard starts give the DAG a name, specify the Witness server, and also specify the file path for the Witness server to use.
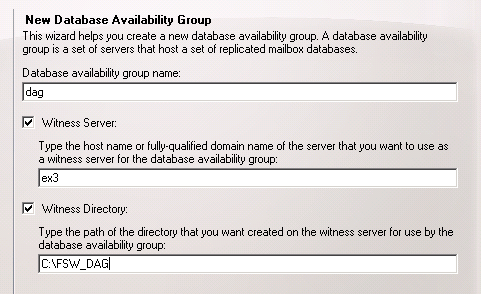
New Database Availability Group Wizard – Basic Info
Click on the New button to create the new Database Availability Group, and then click Finish to close the wizard.
Adding Database Availability Group Members
Right-click the newly created Database Availability Group and choose Manage Database Availability Group Membership.
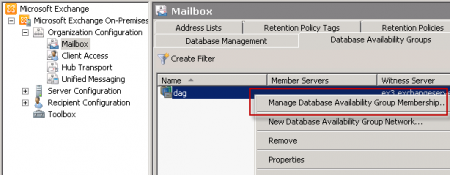
Manage Database Availability Group Members
Click the Add button and select the Mailbox servers that you wish to make members of the DAG.
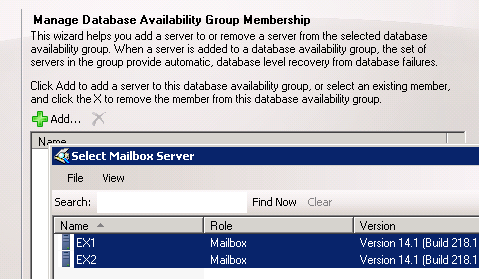
Select Mailbox Servers to become Database Availability Group Members
Click the Manage button to commence adding the Mailbox servers to the DAG. This involves installation and configuration of Windows Failover Clustering on the servers, so it can take a few minutes to finish.
After it has finished the next step is to configure the DAG networking.
Configure Database Availability Group Networking
Right-click the newly created Database Availability Group and choose Properties.
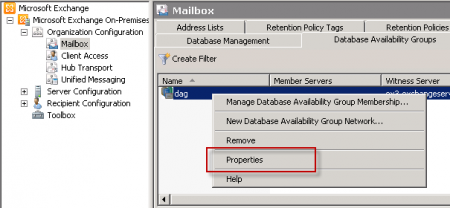
Open the Properties of the Database Availability Group
Select the IP Addresses tab, click the Add button and add a static IP address for the Database Availability Group.
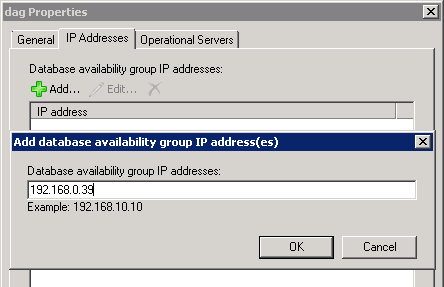
Adding IP addresses to an Exchange Server 2010 Database Availability Group
You will notice that the Database Availability Group has been automatically configured with DAG networks for the subnets that the DAG members have network interfaces connected to.
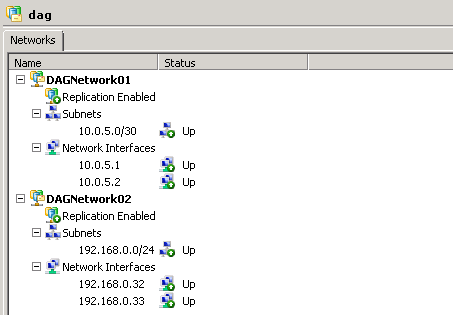
Exchange Server 2010 Database Availability Group Networks
Open the Properties of each DAG network and configure them with meaningful names. If you have configured your network to have a dedicated replication network for the DAG then you should disable replication on the DAG network that is intended for MAPI communications (ie client connections).
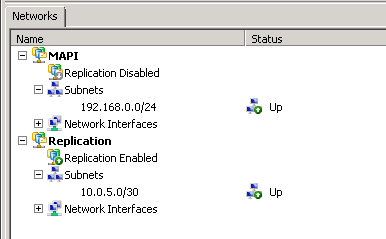
Exchange Server 2010 Database Availability Group Networks Configured
Adding Mailbox Database Copies to DAG Members
With the Database Availability Group established and the networking configured you can now add mailbox database copies to other DAG members.
In the Exchange Management Console navigate to Organization Config/Mailbox and choose the Database Management tab. Right-click a mailbox database and select Add Mailbox Database Copy.
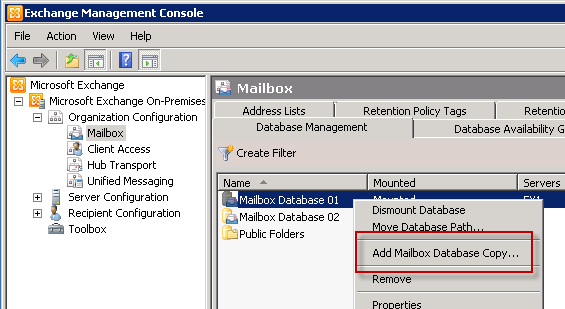
Adding a Mailbox Database Copy in Exchange Server 2010
Click the Browse button and choose the Mailbox server to add the database copy to.
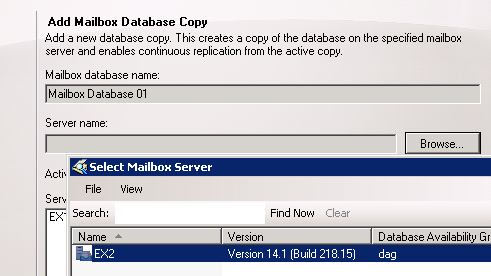
Add Mailbox Database Copies to an Exchange Server 2010 Mailbox Server
Click the Add button to add the mailbox database copy and then click Finish to close the wizard.
The Exchange servers will now commence seeding the replica servers with an up to date copy of the database and all of the current transaction log files. Depending on the amount of data to be replicated this may take some time.

Status of the Database Copies for Exchange Server 2010
Repeat the same process for any other mailbox databases you wish to add database copies for.
Configuration of the Exchange Server 2010 Database Availability Group is now complete.
Categorised as: Exchange, Microsoft
Leave a Reply
You must be logged in to post a comment.