Configuring Windows Server 2012 NIC Teaming to a Hyper-V Virtual Machine
Configuring Windows Server 2012 NIC Teaming to a Hyper-V Virtual Machine
NIC teaming is a new feature of Windows Server 2012, which allows multiple network adapters to be placed into a team for the purpose of providing network fault tolerance and continuous availability. When one of the network adapters fail, the other one takes over without requiring third-party hardware or software. Windows Server 2012 NIC teaming is supported by any vendor’s network card but both are recommended to be identical, in terms of speed and vendor.
Windows Server 2012 supports NIC Teaming up to 32 Network Cards. Hyper-V supports only two.
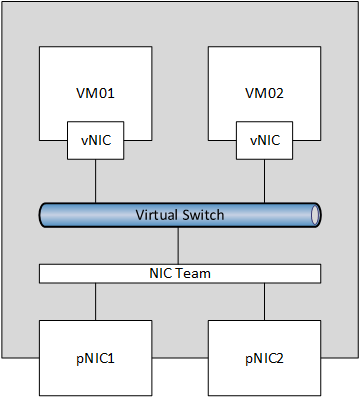
Image Copy From http://www.aidanfinn.com
Here we will configure NIC teaming for Hyper-V virtual machine. In the following steps, we will create, configure and add NIC teaming to a Hyper-V virtual machine.
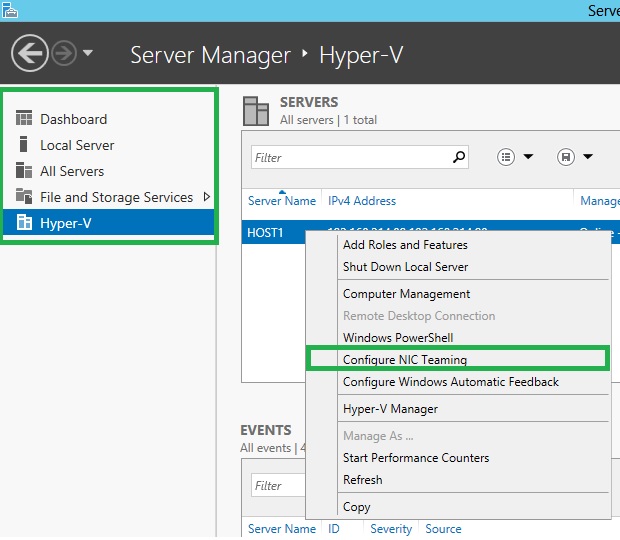
1. Open Server Manager, click on All Servers or Hyper-V on the left-hand side pane, then right-click on the server, HOST1 to enable NIC teaming and select Configure NIC Teaming.
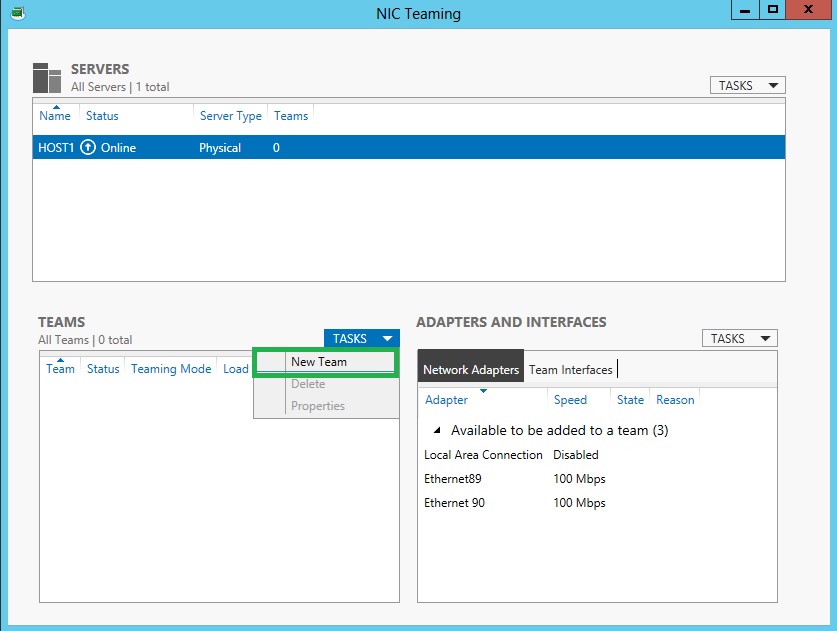
2. In the NIC Teaming dialog-box, click on TASKS and click New Team.
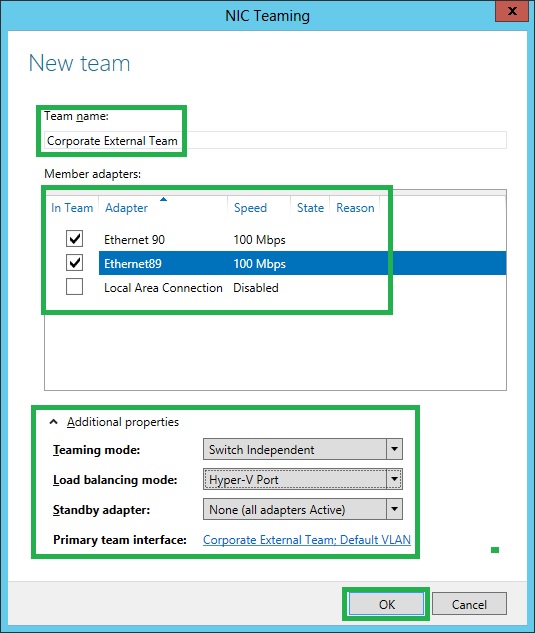
3. In the New team dialog-box, In Team name: type Corporate External Team as the Team name and under Member adapters select the network adapter to add to the NIC teaming. Under Additional properties, selectthe Teaming mode: Switch Independent, Load balancing mode: Hyper-V Port, Standby adapter: None (all adapters Active), Primary team interface: Corporate External Team: Default VLAN and then Click OK.
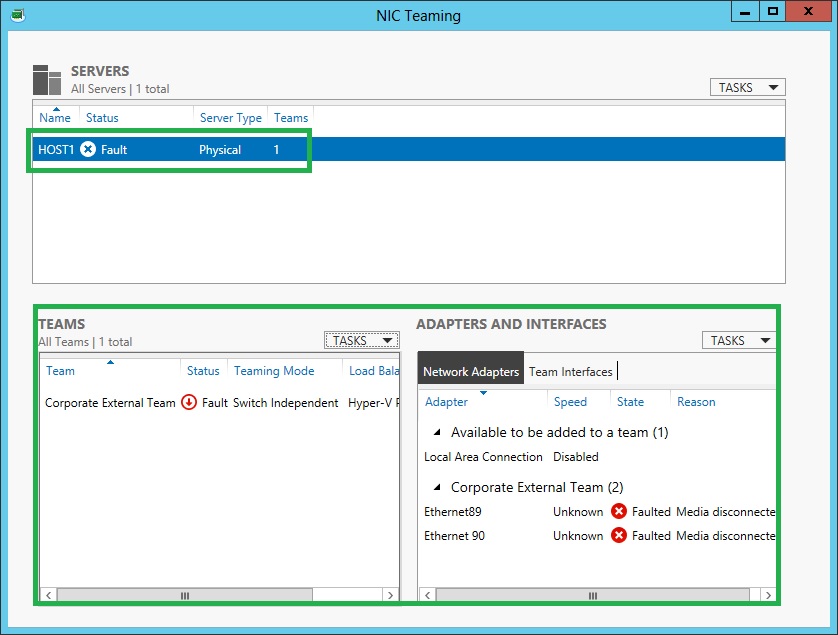
4. For the few seconds, we get Fault Status in NIC Teaming dialog-box and then get Online Status.

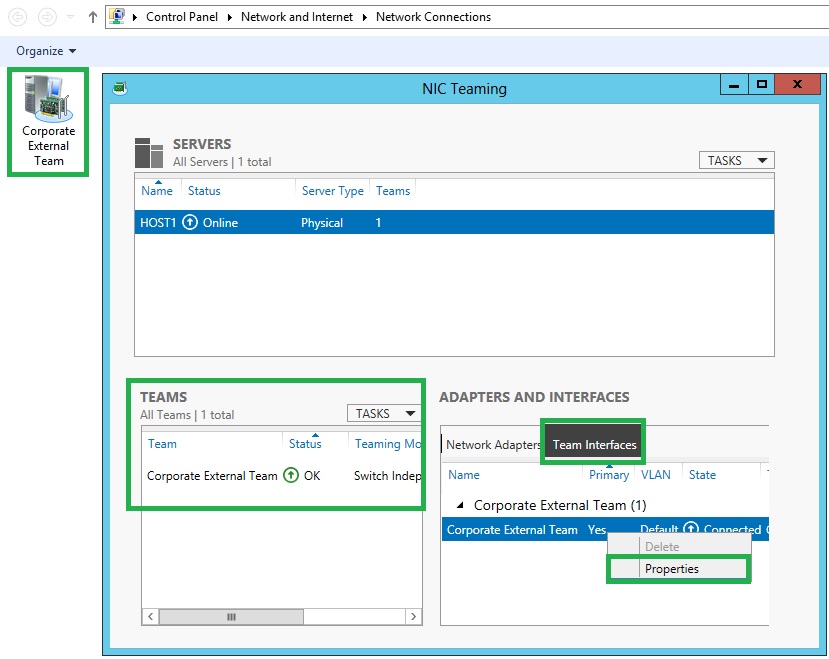
5. Under ADAPTERS AND INTERFACES, Click Team Interfaces Tab, Right-Click on Team Interface name,Corporate External Team and Click Properties.
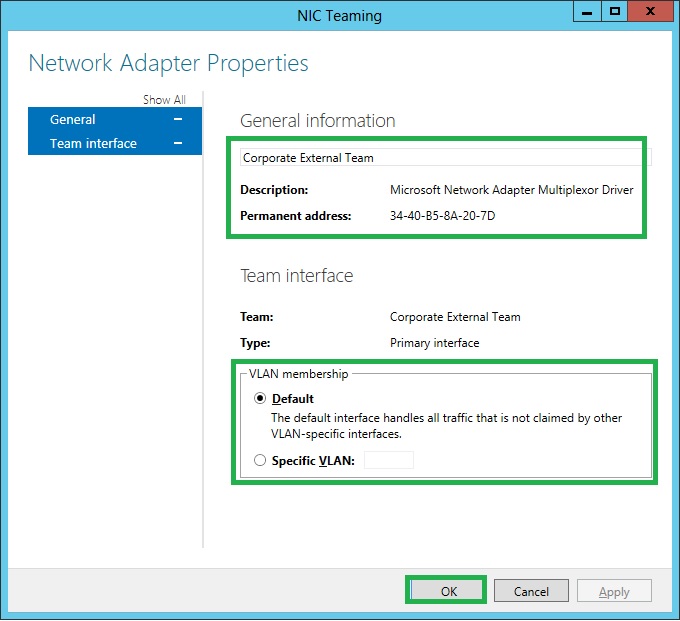
6. In the Network Adapter Properties dialog box, under General information, noted Description: Microsoft Network Adapter Multiplexor Driver. Verify Default VLAN membership and Click OK.
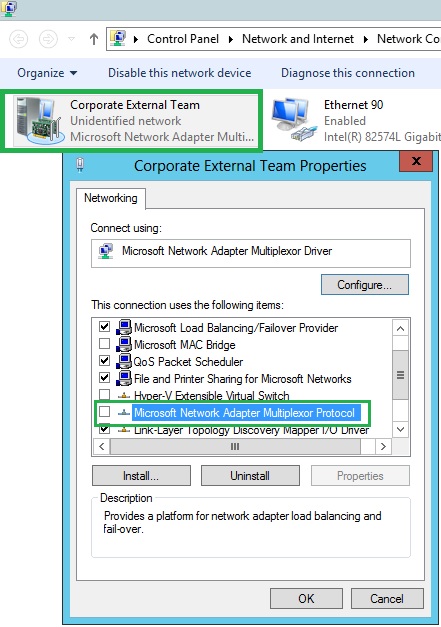
7. In the Network Control Panel, verify Microsoft Network Adapter Multiplexor Protocol under Team Network Properties.
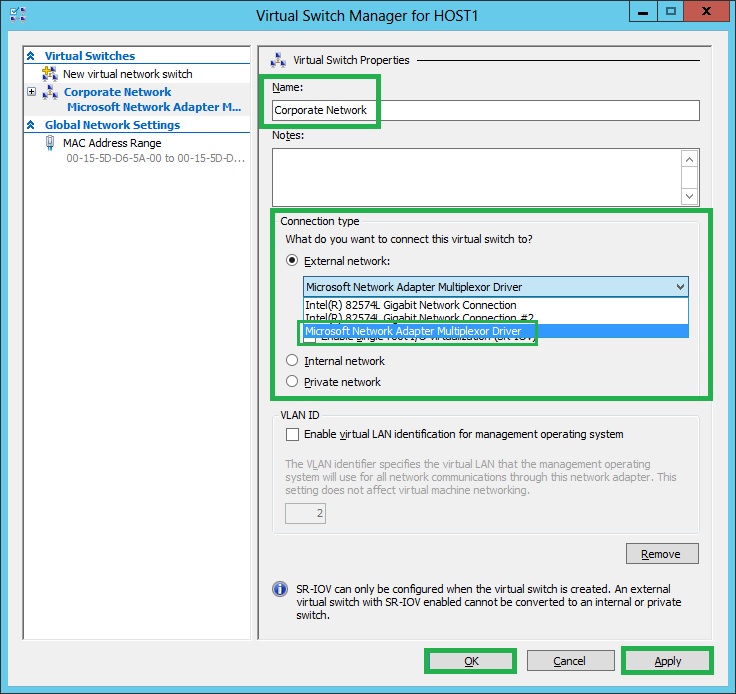
8. In Hyper-V Manager, on the Action pane, click Virtual Switch Manager. In the Virtual Switch Manager dialog box, select New virtual network switch, Ensure that External is selected and Click on Create Virtual Switch. Under External network select Microsoft Network Adapter Multiplexor Driver then Click Apply, review the warning, and then click Yes.
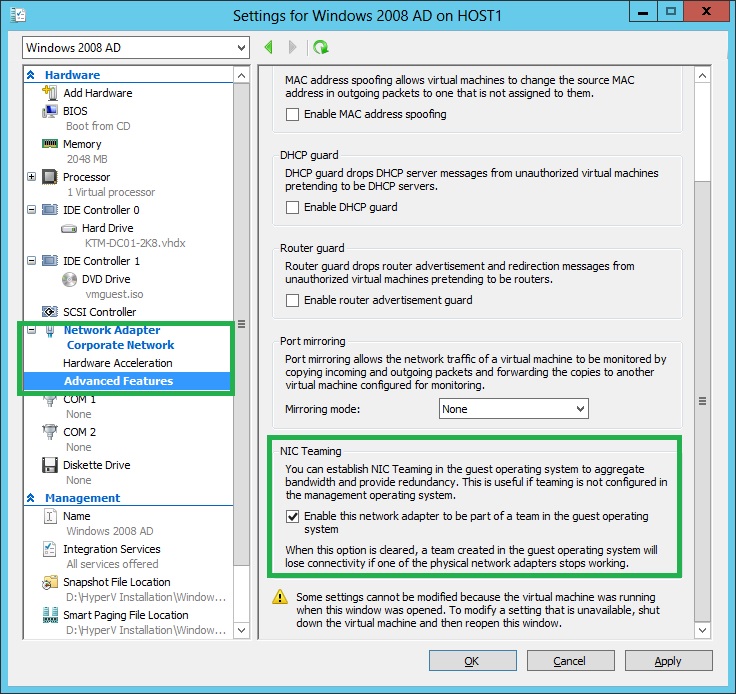
9. Open the Settings of Hyper-V virtual machine, click Network Adapter on the left pane, and selectCorporate Network under Virtual switch. Then Click Advanced Features on left pane, then Click on Enable this network adapter to be part of a team in the guest operating system under NIC Teaming, Click Applyand Click OK.

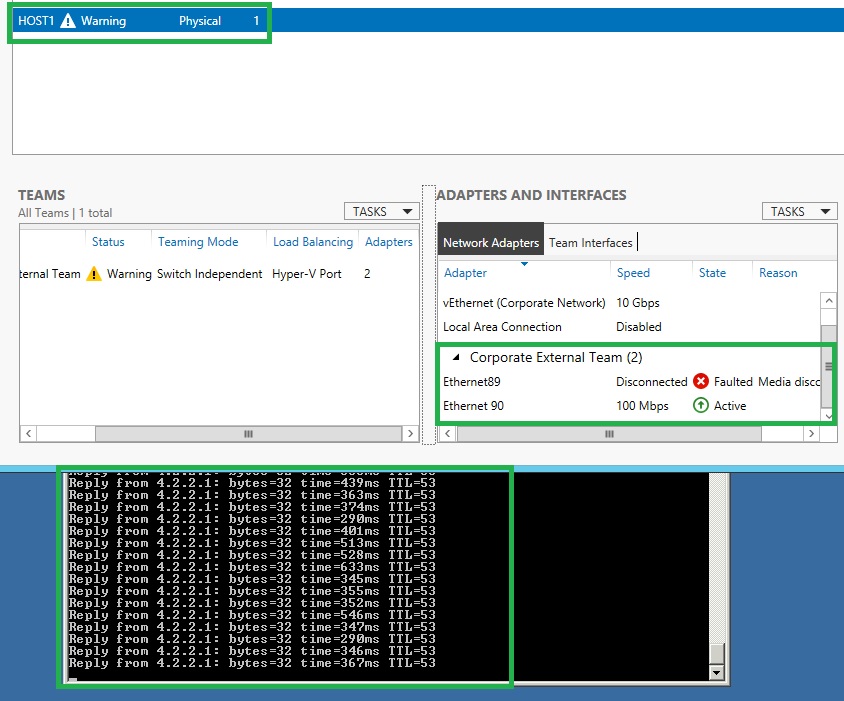
10.To verify NIC Teaming, Unplug Network Cable one of the NIC and PING the Destination Server. We will get Reply from the Destination Server.
Summary:
Network Fault tolerance is often overlooked. In High Availability Systems, this feature can be of great utility as the downtime is zero in terms of Network connectivity due to NIC failure.
Categorised as: Microsoft, Networking, Server OS, Virtual Infrastructure, Windows Upgrade
Leave a Reply
You must be logged in to post a comment.