Transfer Files Between Physical and Virtual Host on Hyper-V
Hyper-V users, there isn’t an easy way like what VMware is offering, however the following 5 ways should solve your problems.
Network File Sharing – Share files on a network like you usually do…
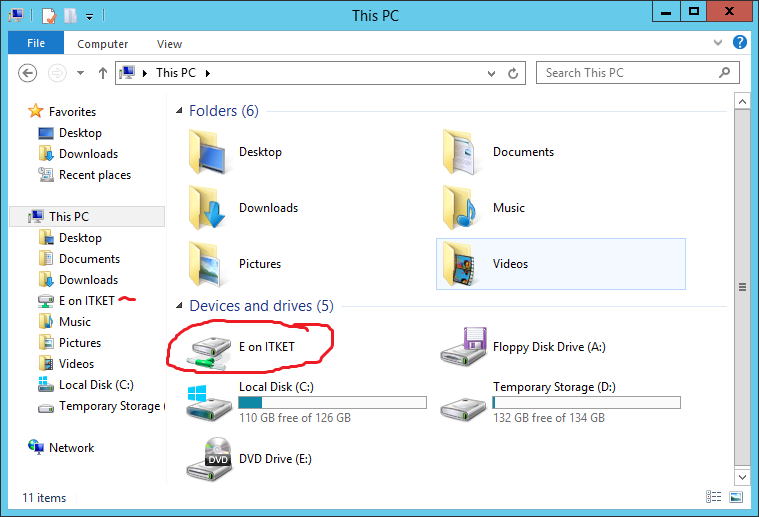
1. On the virtual machine, create a folder on Desktop or any directory you preferred and give it a name.
2. Right click folder and select “Properties”
3. Select “Sharing” tab and click “Advanced Sharing…”
4. Tick “Share this folder” and select “Permissions”.
5. Give “Everyone” permissions like it shown on below picture.
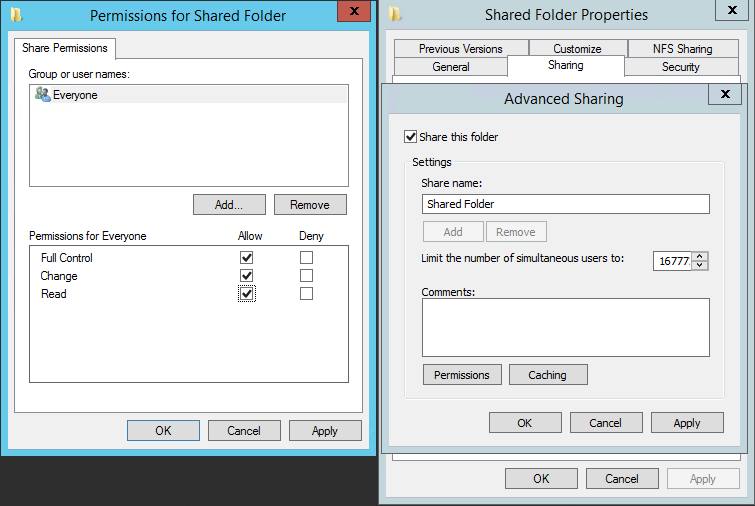
6. Select OK to finish the sharing process.
7. Now what you need to do is, go back to your physical machine and access the shared folder by typing the “\computernameshared folder”.
8. Once you are on it and simply copy files over to the shared drive and it will start appearing on the virtual machine’s shared folder.
Remote Desktop map drive
1. Enable the Remote Desktop service on the virtual machine Server 2012 or other Windows OS, just make sure the Remote Desktop Service it is enabled so it can accept the service from client machine.
2. On Windows Server 2012 R2 to enabled Remote Desktop Service, go to “Server Manager” -> select “Local Server” from the left hand side menu.
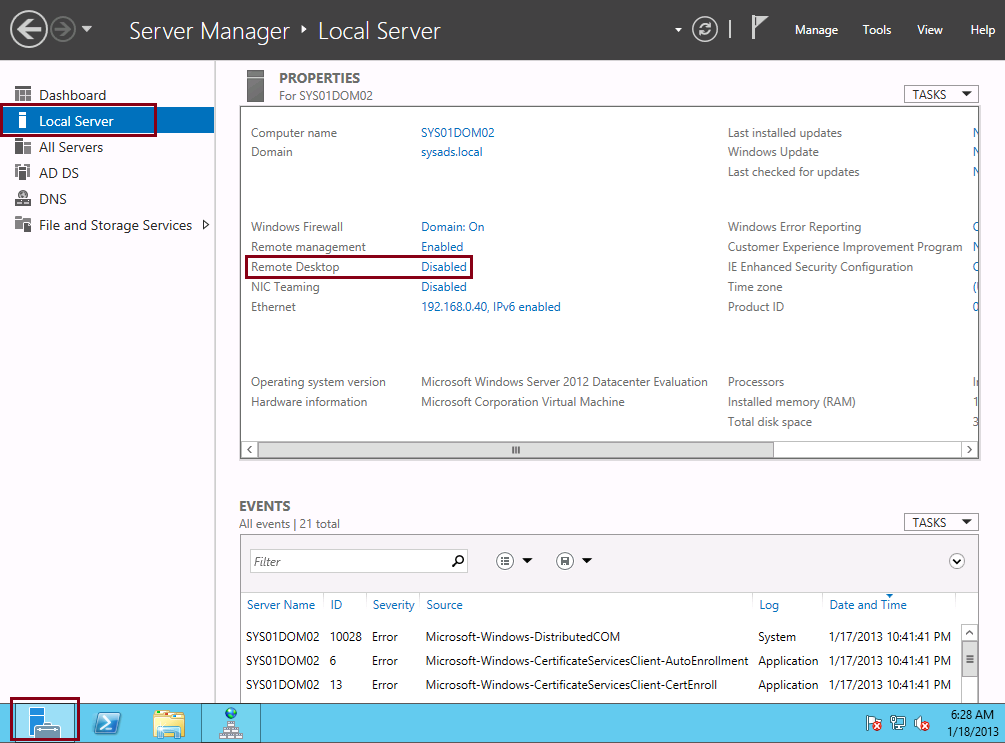
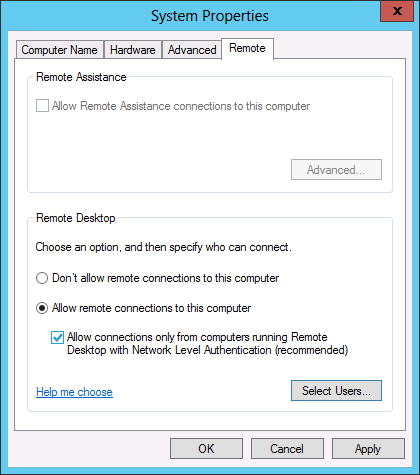
3. Enable Remote Desktop by click on it, select “Allow remote connections to this computer” and un-tick the Recommended setting.
4. Now restart the virtual machine Server 2012.
5. Once the virtual machine Server 2012 is back and running, connect to the VM Server 2012 using Remote Desktop Connection.
6. On Remote Desktop Connection windows click “Local Resources”, under “Local devices and resources” tab click on “More”, expand “Drives” list and tick the drive you wanted to map.
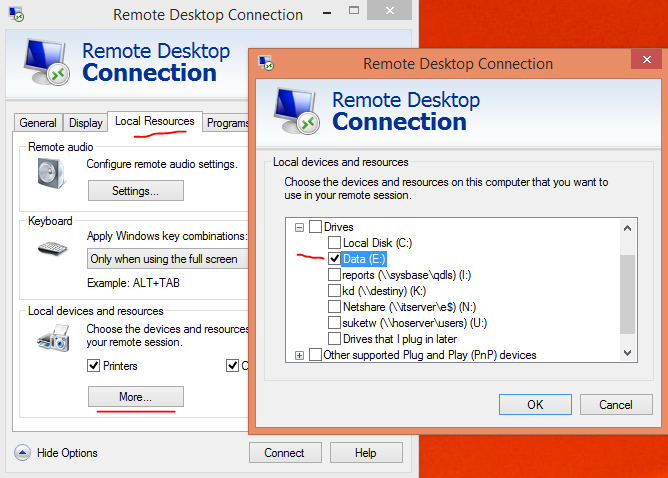
7. Click OK and connect! Now see what you have on “My computer”!
8. Drag any files to the local drive on your PC and those files will appear on the Cloud VM server mapped drive.
Hyper-V USB offline
1. Make sure you have plugged the USB drive you are going to use to the computer.
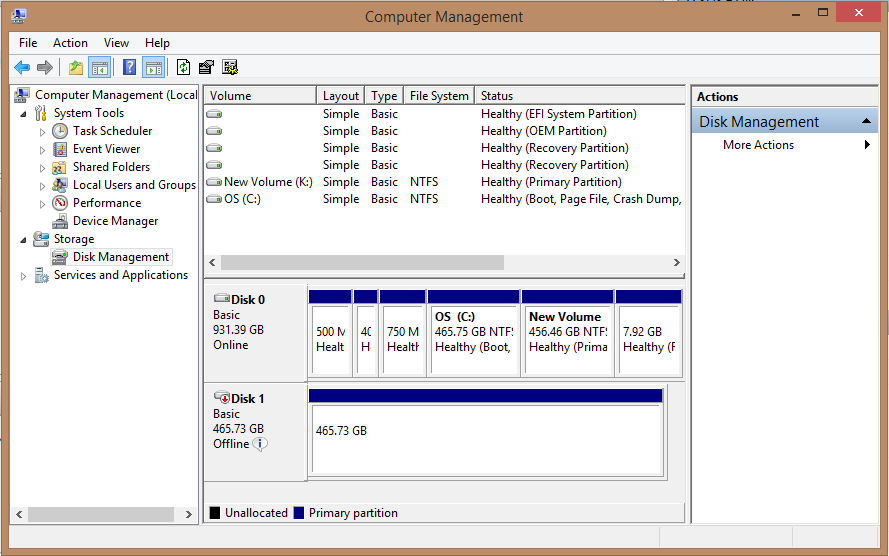
2. Go to Start-> Control Panel -> Administrative Tools -> Computer Management
3. Select “Disk Management” from the left hand side menu
4. Right click the USB Drive and select “Offline”

5. Go to Hyper-V Manager and shutdown the running virtual machine
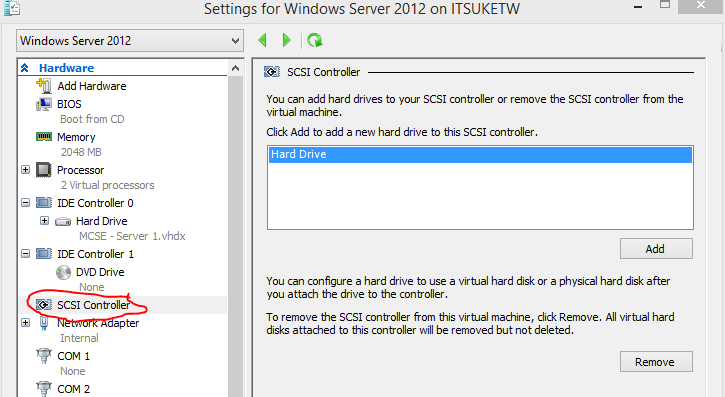
6. Right click the virtual machine and select “Settings”.
7. Select “SCSI Controller” and click “Add” a hard drive
8. Now select “Physical hard disk:” the USB drive you have just took offline on Disk Management.
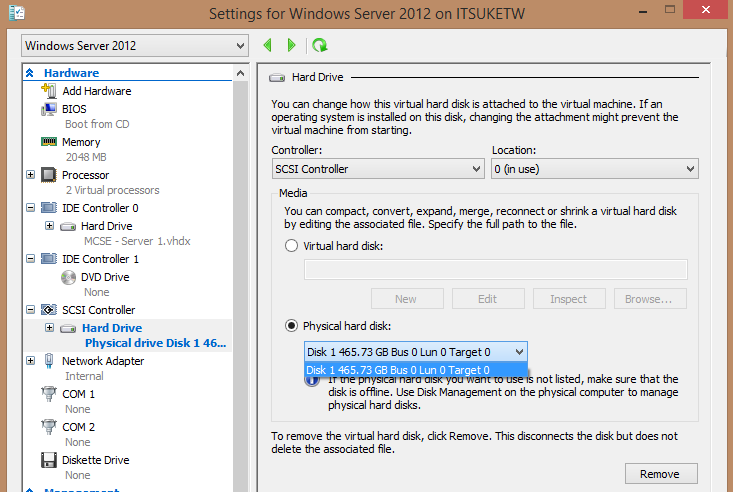
9. Click “Apply” and OK to finish.
10. Start up the virtual machine and you should have the USB drive appeared on “My Computer”.
Categorised as: Microsoft, Networking, Server OS, Virtual Infrastructure, VMWare/ESX
Leave a Reply
You must be logged in to post a comment.