Windows 2012 – How to configure Multi Path iSCSI I/O
This is how to configure Multi Path I/O for iSCSI on Windows 2012 Server. I want to use this for our Hyper-V implementation to increase through put and redundancy.
Setup iSCSI NICs
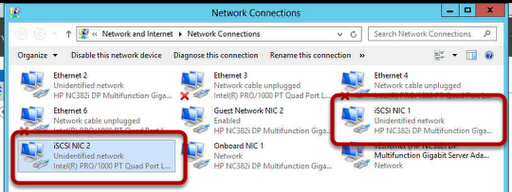
In this server I have eight NICS, I have chosen to use two NICS for iSCSI and here you can see I have chosen to use one onboard Broadcom NIC and one PCI-e slot Intel NIC. Each NIC is configured with an IP address in the subnet of the storage network. In this case it is
10.12.0.40 255.255.255.0
10.12.0.41 255.255.255.0
The SAN is a HP MSA P2000 G3 iSCSI LFF and I have configured the Host NICS as
10.12.0.21 255.255.255.0
10.12.0.22 255.255.255.0
10.12.0.23 255.255.255.0
10.12.0.24 255.255.255.0
10.12.0.25 255.255.255.0
10.12.0.26 255.255.255.0
10.12.0.27 255.255.255.0
10.12.0.28 255.255.255.0
NIC Configuration
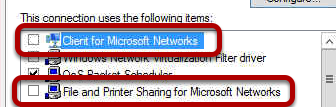
On each NIC you can remove services that are not required for iSCSI so I have unchecked Client for Microsoft Networks and File and Printer Sharing for Microsoft Networks.
Set IP Address
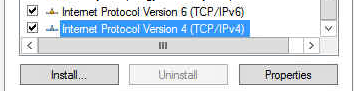
I will be using IP v4 for this implementation.
Confirm IP Address
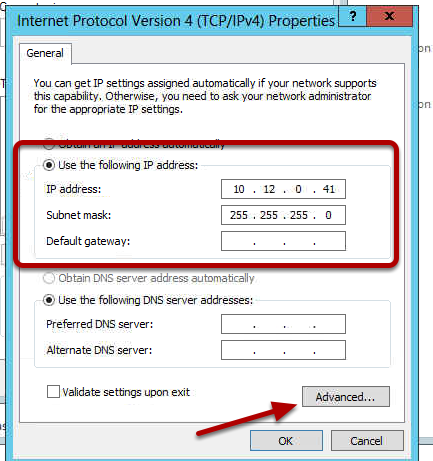
Use static IP addresses to reduce need for DHCP and network overhead for that protocol. You do not need a gateway if the storage network is not to be routable. Each NIC needs to not use DNS to again improve performance so choose the Advanced option.
Do not register in DNS
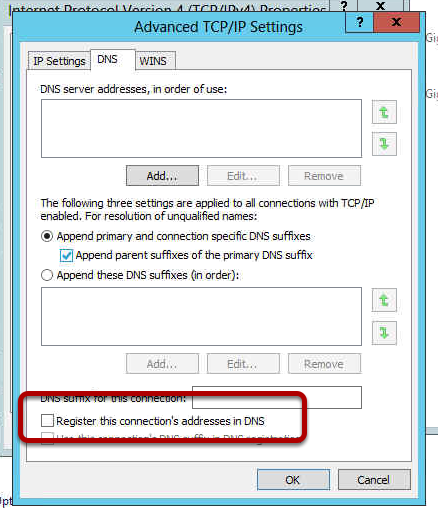
Uncheck the option for Register this connections addresses in DNS. We do not want any IP from the iSCSI network in DNS.
Advanced NIC Settings
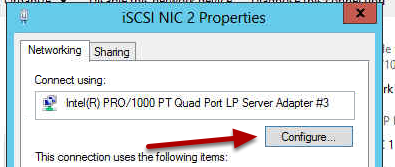
Each NIC has advanced settings and some relate to Power Management, we do not want any interruptions in the iSCSI network so we will change the advanced settings with the Configure option.
Power Management
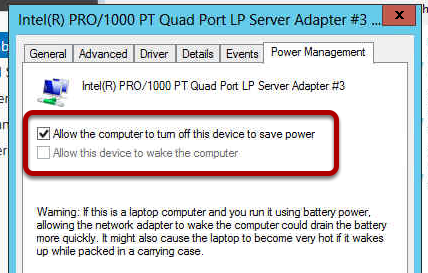
Uncheck the option Allow the computer to turn off this device to save power.
Add MPIO Role
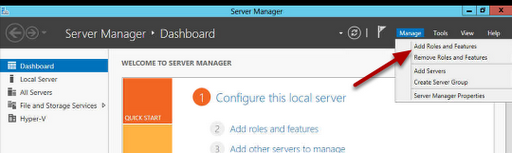
Now we will add the Multi Path Input Output (MPIO) role to the server so that we can use MPIO. From the Server Management dashboard choose the Manage Add Roles and Features option.
Add Features
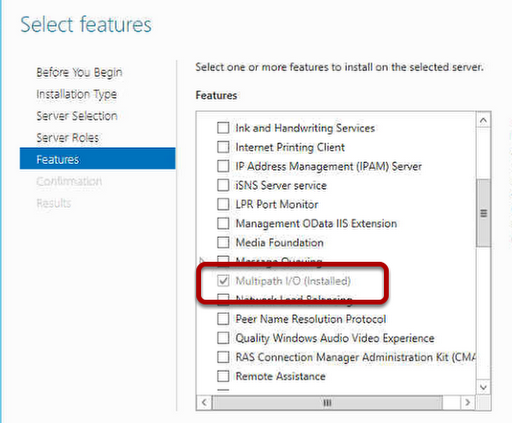
Follow through the add roles and features and then at the Select Featuresoption choose Multipath I/O. In this example I have already installed this feature which is why the (Installed) is displayed. The server will now installt he MPIO feature.
MPIO Tools

Once the feature is installed you can then choose Tools MPIO from the Server Management Dashboard.
MPIO Properties – Immeadiate Reboot Required
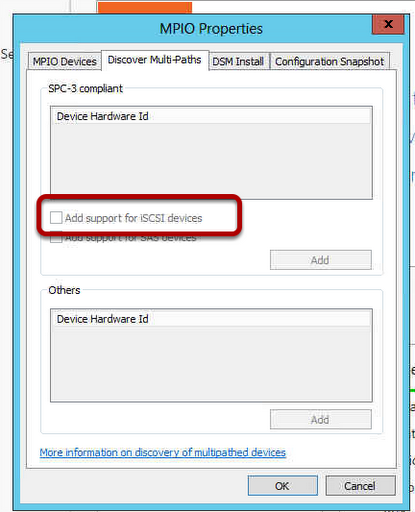
In the MPIO dialog choose the Discover Multi-Paths tab and then check theAdd support for iSCSI devices option. The server will now require an immeadiate reboot so be prepared.
iSCSI Initiator
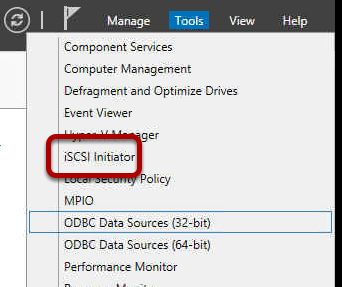
Now the server has rebooted we are ready to setup iSCSI, this is done from the Server Management and Tools, iSCSI Initiator.
Connecting to a Target
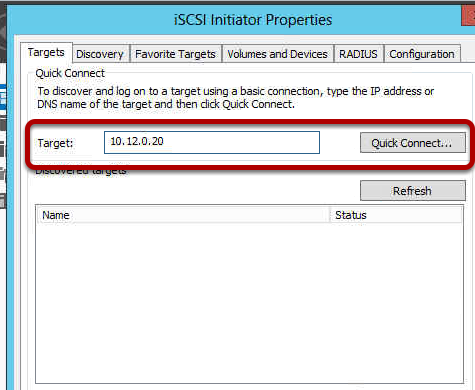
iSCSI works be connecting to a Target, the target is most likely a disk SAN or similar, in our case it is the HP MSA P2000 G3 iSCSI SAN. A target is an IP address that is configured on the iSCSI port on the SAN. 10.12.0.20 is the first IP address assigned to my Controller A iSCSI A1 port so I choose the Quick Connect option.
Quick Connect
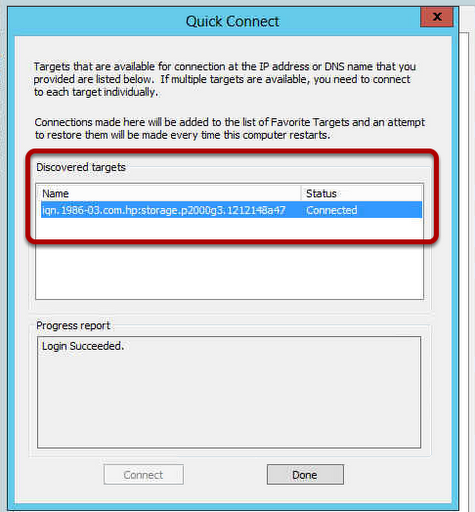
The quick connect will now communicate to the SAN using the iSCSI NIC on the server and the iSCSI port on the SAN. It negotiates and we see under the Discovered Targets section the IQN of the SAN. You can see in the IQN name the hp:storage.p2000 text, this is part of the IQN name of our SAN. You can check this information on your iSCSI Storage Device as these will be different across manufacturers. Click Done to return to the iSCSI Initiator.
Add the first Multi Path
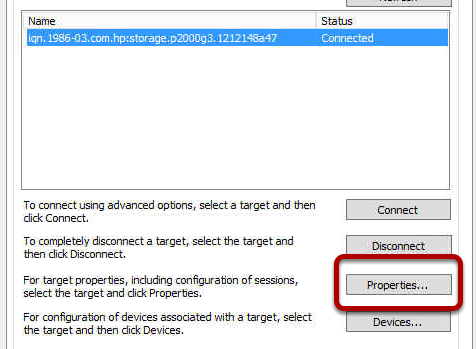
Select the target and then click on Properties to add the next path to the iSCSI Storage Device.
Sessions
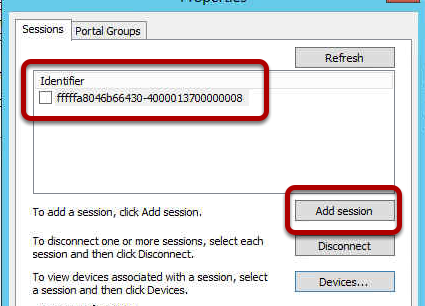
This dialog will show the existing sessions to the iSCSI Storage Device, we have only added one session so far so we will only have one path to the iSCSI Storage Device and if we removed the network cable for the iSCSI NIC we would lose connection to the target. What we want is to be able to lose one connection and know that the second iSCSI NIC can carry on the iSCSI traffic. So choose Add Session to add the second iSCSI session.
Connect to Target
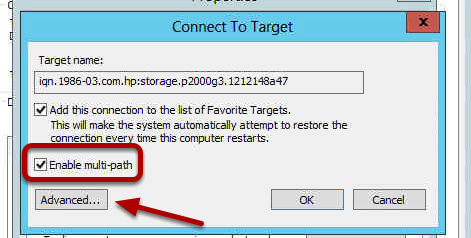
When you add the new session you are asked do you want to use Multi Path,, check the Enable Multi-Path option and then choose the Advancedoption.
Advanced Settings
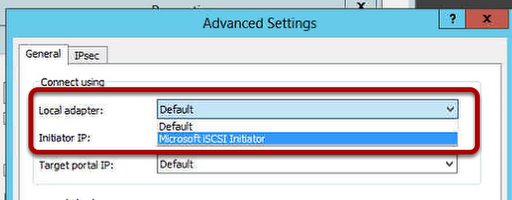
In this dialog we are going to choose which type of adapter we are going to use, as we have no Hardware Based Adapters (HBA) we will use theMicrosoft iSCSI Initator which is software based so select this from the Local Adapter dropdown.
Intiator IP

From the Initiator IP dropdown choose the IP Address you have assigned to the second iSCSI NIC, in this case this is the IP address 10.12.0.40. This will now connect the second iSCSI NIC to our target so that both iSCSI NICS can communicate with the iSCSI Storage Device. Choose OK.
Confirm MPIO for each Session
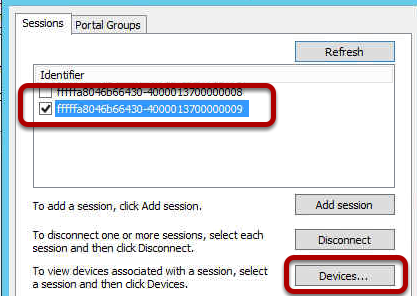
A session will now be created with a long GUID, check the new session and then click on the Devices button to see what devices are connected in this session. We are looking to see two devices, one for each of the iSCSI Target IP addresses.
Devices
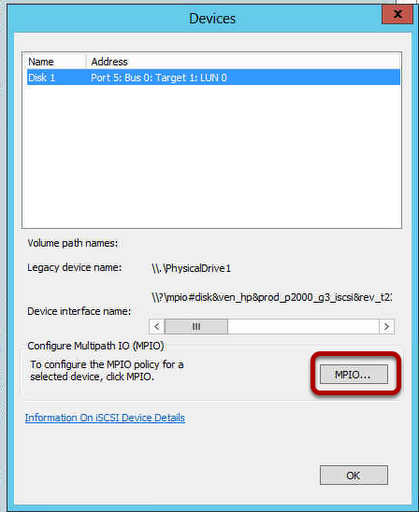
I recommend that you create a LUN on your iSCSI Storage Device in advance as you then have a device to see as connected, here I can see the disk I have created on LUN 0. I now choose the MPIO button.
Device Details
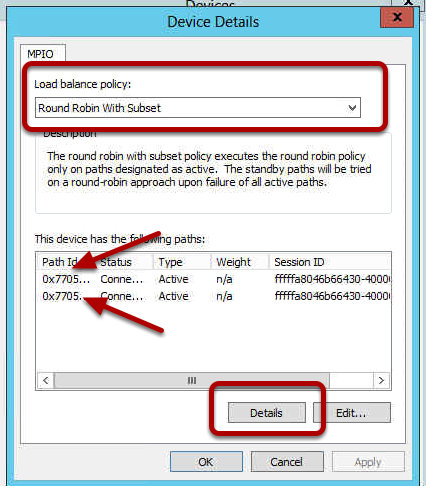
This displays the MPIO details and the Load Balance Policy. This is the way that the MPIO trys to communicate with the iSCSI Target, we would like it toRound Robin. This means that the first IP address is sent a packet and then the next and so on until the packets come round to the start again. The benefit here is that all paths get used and you can have multiple packets sent at once so you get better performance. If a path is down due to a cable failure or swich failure the round robin notices this and ignore the path and sends the packet on the next active path. So you have a high performance and redundant iSCSI infrastructure.
To see the IP addresses used for a path, click on a path and then choose the Details button.
MPIO Details
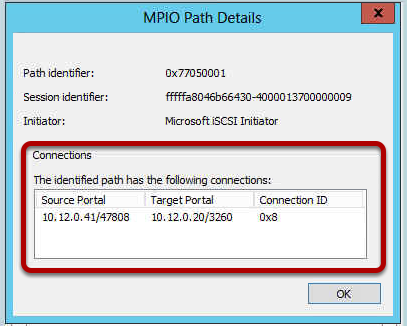
In the details of the path you can see the Source and Target IP address details. Here we can see the Source is the iSCSI NIC on the server 10.12.0.41 and the target is the IP address of Controller A iSCSI A1 port 10.12.0.20.
MPIO Details on second path
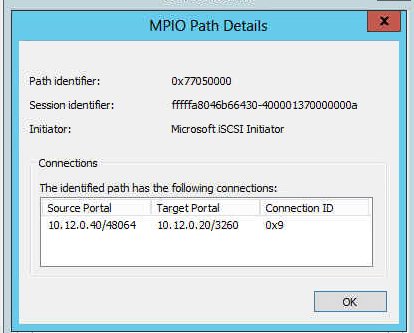
On the second path you can see the Source is now the other iSCSI NIC on the Server and the Target is the Controller A iSCSI A1 port so we have two paths now to this target.
Confirm the MPIO

You can confirm the MPIO in use with a command line tool calledmpclaim. Here I have ran the command mpclaim -v c:config.txt This will output the MPIO configuration in verbose mode to a text file so it is easy to read.
Text File Output
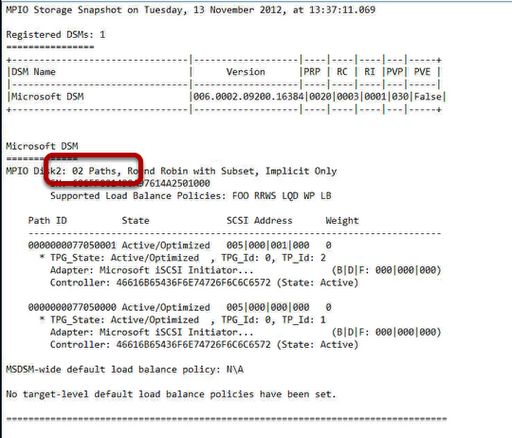
I open the Config.txt file and I can see the MPIO states we have 2 Paths so I know the paths I have created are live. So all I need now is to go do this all again for each target IP addresss on my iSCSI Storage Device to built the multiple paths.
Categorised as: Microsoft, Networking, Server OS, Windows Upgrade
Leave a Reply
You must be logged in to post a comment.