High Availability Changes in Exchange Server 2010? DAG part 3
Introduction
In the second part of this multi-part article uncovering Exchange 2010 Database Availability Groups (DAGs), we prepared the two servers and installed Exchange 2010 on both.
In this article, we will continue where we left off. We will move the databases to the LUNs attached to each server, create the DAG and test that it works as expected.
Changing the Exchange Database paths
So with Exchange 2010 installed on the servers, the first step is to move and rename each mailbox database. To do so launch the Exchange Management console and navigate to the Mailbox node under the Organization Configuration work center. The first tab here is Database Management, which should be selected. Under this tab, right-click on each mailbox database and select Move Database path in the context menu as shown in Figure 1.
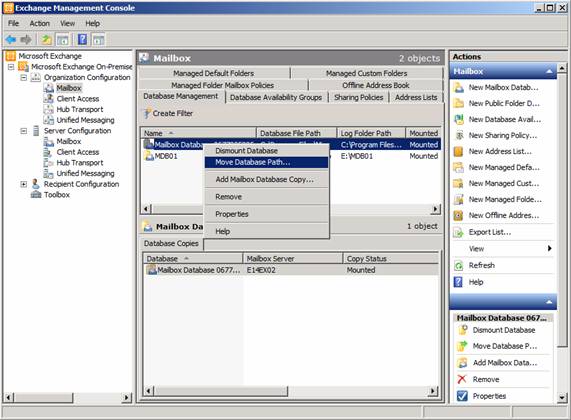
Figure 1: Move Database Path
In the Move Database Path wizard, change the path for the database and logs, so that they are placed in the LUNs we created in part 1. I also suggest you change the name of each database to MDB01.edb and MDB02.edb as shown inFigure 2.
When done, click Move.
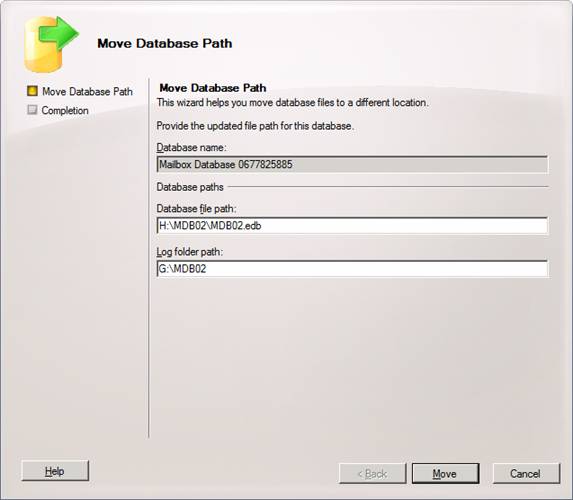
Figure 2: Changing the path for the database and log files
When they have been moved, click Finish to exit the wizard (Figure 3).
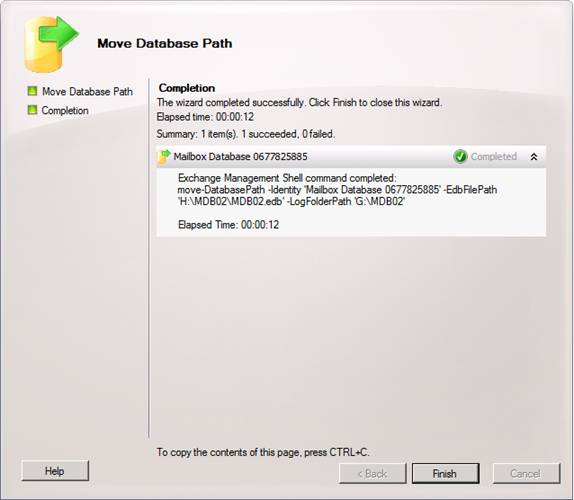
Figure 3: Database and log file path changed successfully
Now right-click on the databases and this time select Properties. Change the name to the name of the edb file itself (in this case to MDB01 and MDB02), and then click OK.
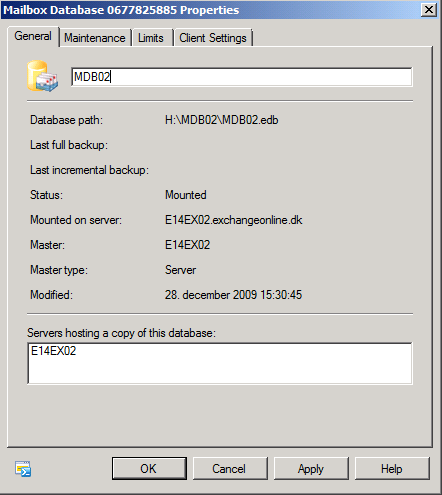
Figure 4: Changing the name of the databases
That was better. This makes it a little easier to specify database names etc. when using the Exchange Management Shell.
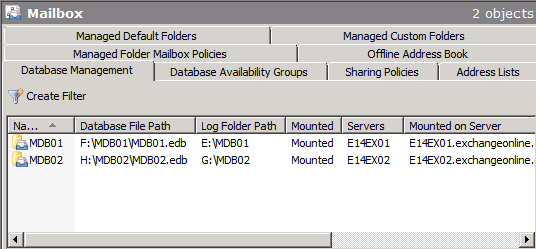
Figure 5: Database names and paths changes
Adding the Exchange Trusted Subsystem group to Non-Exchange Servers
Since we only have two Exchange 2010 servers in our organization, we will not use an Exchange 2010 Hub Transport server (as is the recommended server role to use for the witness server) as the witness server, but instead a traditional Windows Server 2008 R2 File server. This means that we must add the Exchange Trusted Subsystem group to the local administrators group on the file server. To do so, log on to the fileserver and open the Server Manager. ExpandConfiguration > Local Users and Groups, and then open Properties for the Administrators group.
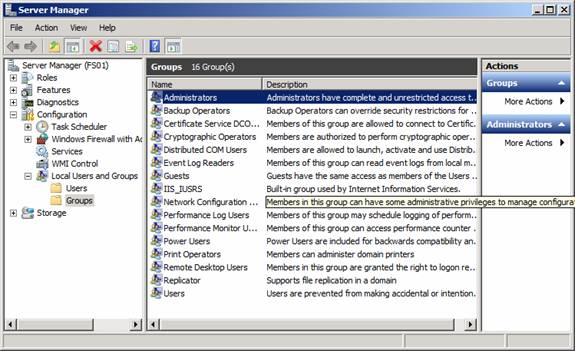
Figure 6: Finding the local administrators group on the Windows Server 2008 R2 file server
Enter the Exchange Trusted Subsystem group in the text box as shown in Figure 7, then click OK.
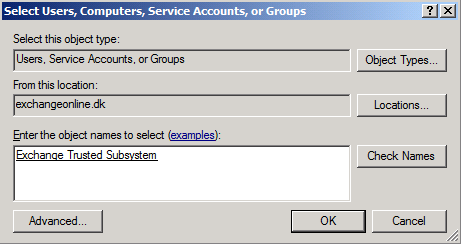
Figure 7: Entering the Exchange Trusted Subsystem group
Click OK again.
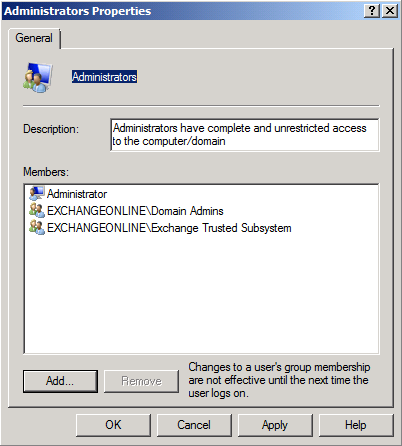
Figure 8: Property page of the Administrators group
This step is necessary only when using a non-Exchange server as the witness server. By the way, it is not recommended to use a domain controller as the witness server because this way you grant the Exchange Trusted Subsystem group many permissions in the Active Directory domain.
Creating the Database Availability Group
With that we are actually ready to create the DAG itself. This can both be done via the Exchange Management Console or the Exchange Management Shell. In this article we will use the console. So under the Mailbox node, select the Database Availability Group tab, then right-click somewhere in the white area. In the context menu, select New Database Availability Group as shown in Figure 9.

Figure 9: Selecting New Database Availability Group in the context menu
In the Database Availability Group wizard, enter a name for the new DAG. Also, specify the witness server and the witness directory on that server (Figure 10). When you have done so, click New.
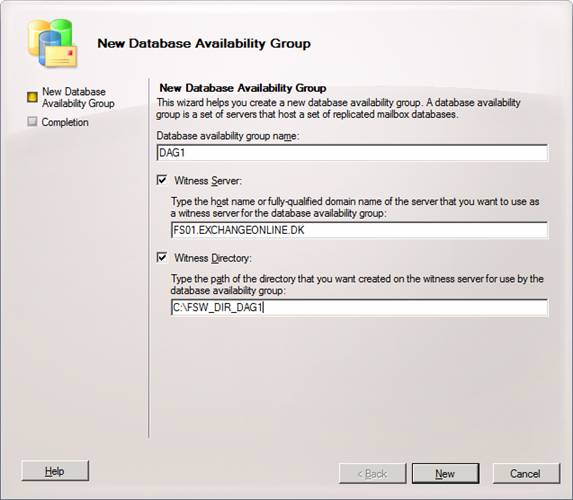
Figure 10: Specifying the DAG name as well as witness server and directory
On the Completion page, we get a warning that the specified witness server is not an Exchange Server. You can ignore this.
Click Finish to exit the wizard (Figure 11).
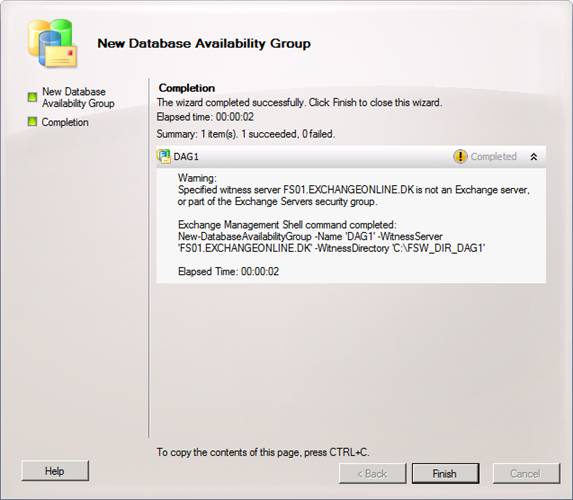
Figure 11: Database Availability Group wizard – Completion page
Now that we have created the DAG we can move on and add the two Mailbox servers as member servers. To do so, right-click on the newly created DAG and select Manage Database Availability Group Membership in the context menu as shown in Figure 12 below.
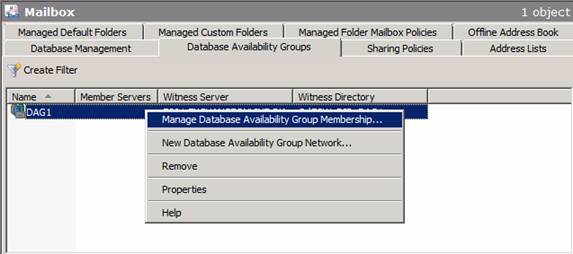
Figure 12: Selecting Manage Database Availability Group Membership
This opens the Manage Database Availability Group Membership wizard, where we click Add.
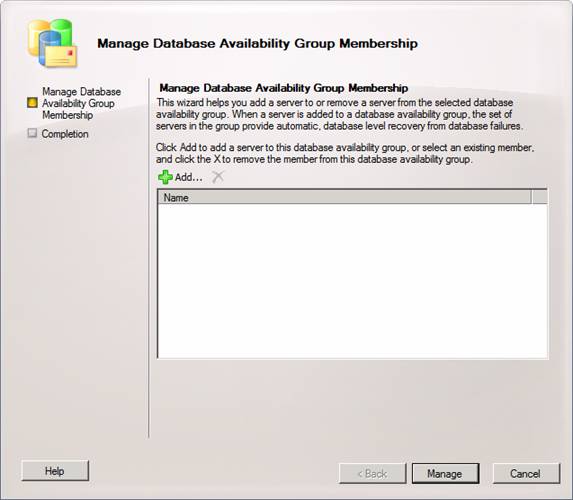
Figure 13: Manage Database Availability Group Membership wizard
Now select the two servers and click OK.
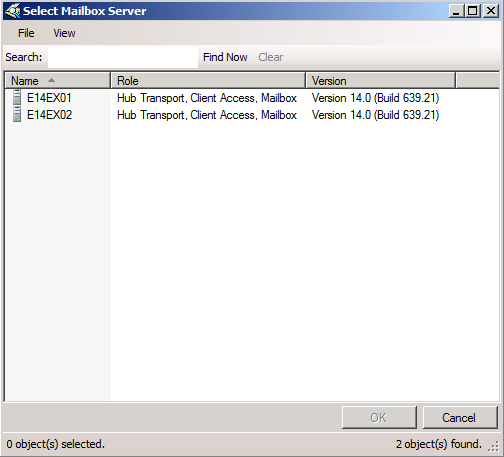
Figure 14: Adding member servers to the Database Availability Group
Click Manage.
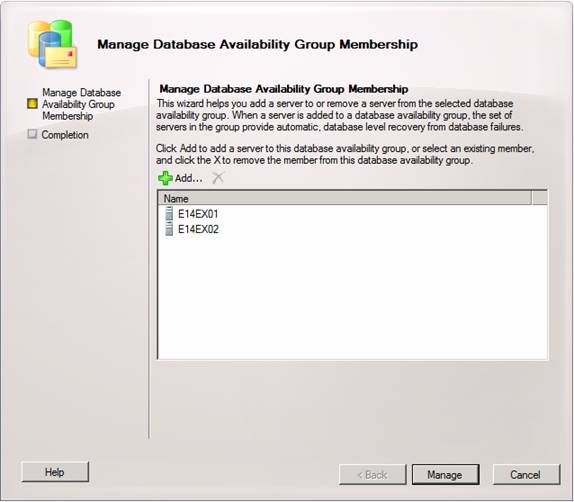
Figure 15: Member servers added to the Database Availability Group
The failover clustering component will now be installed on each server. Then the DAG will be created and configured accordingly. This can take several minutes so have patience.
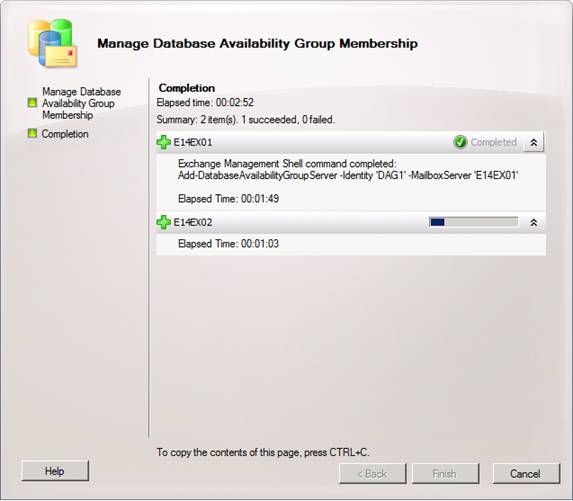
Figure 16: Waiting for the Manage Database Availability Group Membership wizard to complete
If you do not have DHCP available on the network while the member servers are being added to the DAG, you will get the warning shown in Figure 17.
Note:
DHCP assgined addresses are fully supported for DAG purposes. Actually the Exchange Product group are of the belief most customers will find it a good idea to use a DHCP assigned address for the DAGs. Well, personally I like to give it a static IP address, but that’s just me.
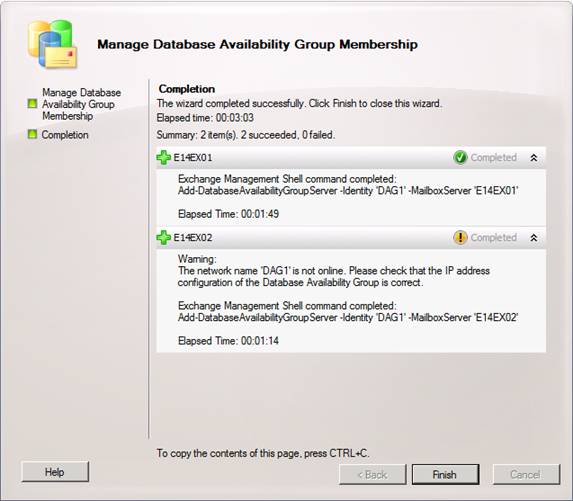
Figure 17: Member servers added to the DAG
This is fine, we will add a static IP address to the DAG right away. The consecvences of not having an IP address configured for the DAG is that the cluster core resources cannot be brought online as shown in Figure 18.
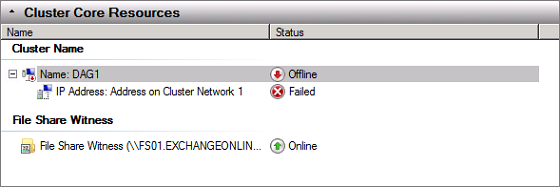
Figure 18: Cluster core resources offline in Failover Clustering console
One of the things that are missing from the GUI is the option of assigning a static IP address to the DAG, so we need to perform this task via the Exchange Management Shell. So let’s launch the shell and enter the following command:
Get-DatabaseAvailabilityGroup | FL
This shows us, as expected, no IP address is configured for the DAG.
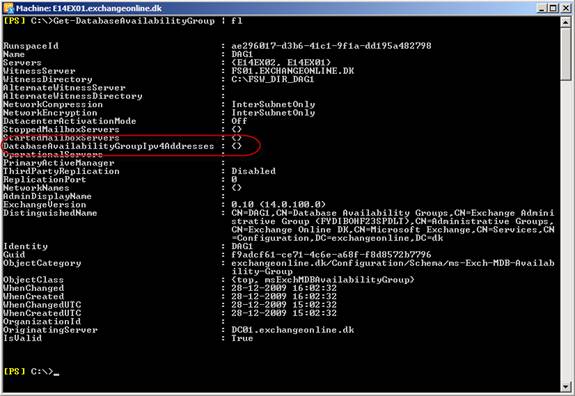
Figure 19: No IP address assigned to the DAG
To assign a static IP address, we need to use the Set-DatabaseAvailabilityGroup cmdlet with theDatabaseAvailabilityGroupIpAddresses parameter:
Set-DatabaseAvailabilityGroup DAG1 –DatabaseAvailabilityGroupIpAddresses 192.168.2.194

Figure 20: Static IP address assigned to the DAG
Now that we have assigned the IP address to the DAG, the cluster core resources can be brought online.
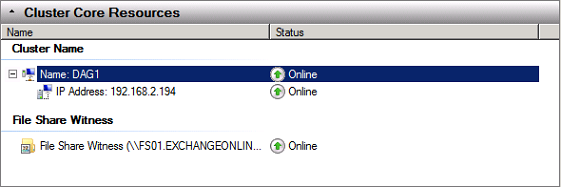
Figure 21: Cluster core resources online in the Failover Clustering console
Adding Mailbox Database Copies
Okay it is time to add database copies to the two mailbox databases as a DAG otherwise does not really make any sense. To do so, select the Database Management tab under the Mailbox node in the Organization Configurationworkcenter. Here you right-click on each database and select Add Mailbox Database Copy in the context menu (Figure 22).
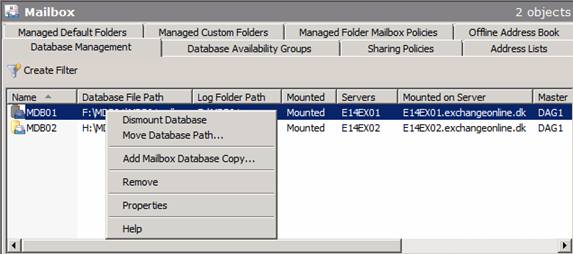
Figure 22: Adding database copies to each Mailbox database
In the Add Mailbox Database Copy wizard, click Browse.
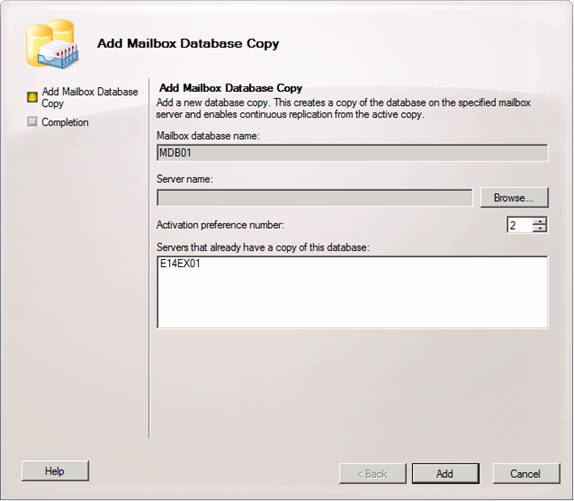
Figure 23: Add Mailbox Database Copy wizard
Now select the mailbox server and click OK.
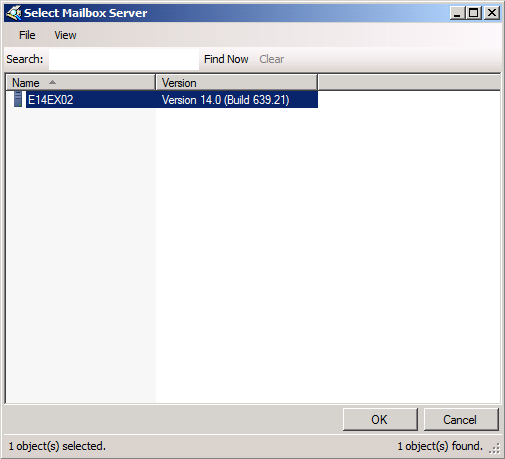
Figure 24: Selecting the mailbox server that should store a database copy
Back in the Add Mailbox Database Copy wizard wizard, click Add.
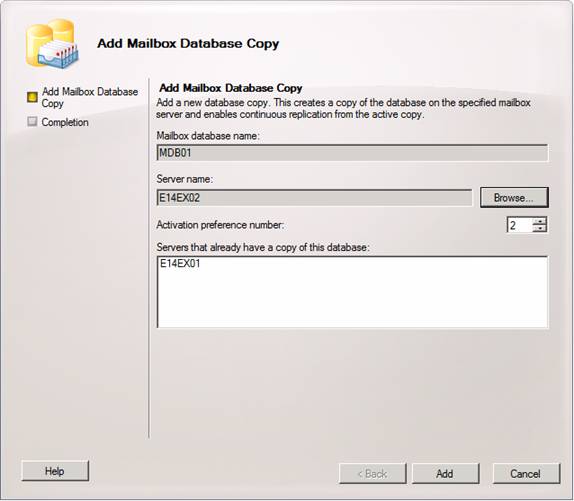
Figure 25: Adding the Database copy to the other Mailbox server
When the wizard has completed successfully, click Finish to exit.
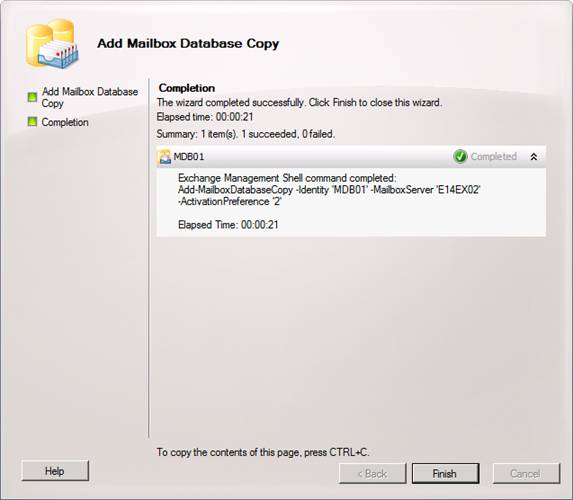
Figure 26: Database copy added with success
As you can see in the Exchange Management Console (Figure 27), we now have a healthy copy of the active database.
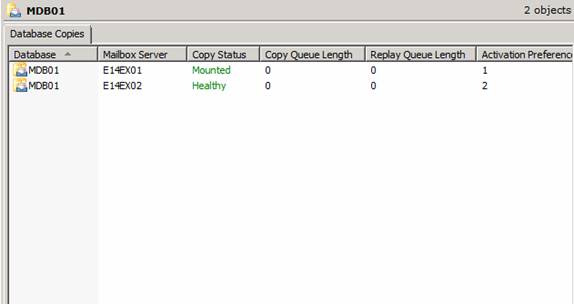
Figure 27: Healthy copy of active database
If we log on to the Mailbox server to which the database copy was added, we can also see that the database has been seeded (Figure 28) and the log files has been replicated (Figure 29).
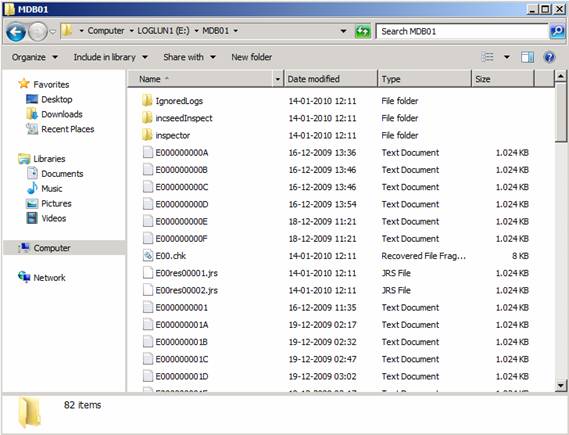
Figure 28: Log files replicated to the Mailbox server holding the passive database copy
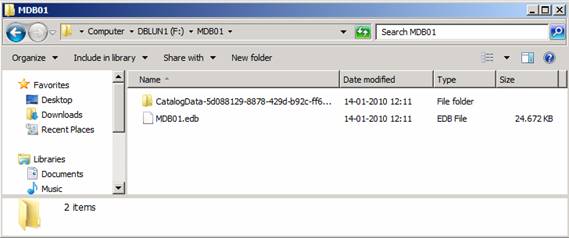
Figure 29: Database seeded to the other Mailbox server
Now perform the same steps for the other Mailbox database.
We have reached the end of part 3. In the next part we will have a look at how you re-seed databases, how database fail/switch-overs (*-overs) work and much more. See you then!
—
http://blog.shiraj.com/2013/02/high-availability-changes-in-exchange-server-2010-dag-part-1/
http://blog.shiraj.com/2013/02/high-availability-changes-in-exchange-server-2010-dag-part-2/
http://blog.shiraj.com/2013/02/dag-part-4/
Categorised as: Exchange, Microsoft
Leave a Reply
You must be logged in to post a comment.